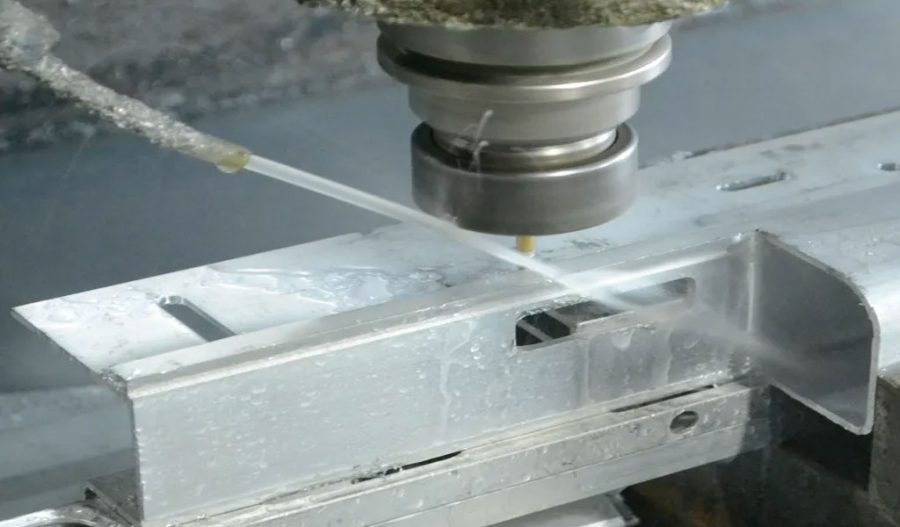
The positioning accuracy of the aluminum 5 Axis cnc machining center refers to the position accuracy that each coordinate axis of the machine tool can achieve under the control of the numerical control device, and can also be understood as the motion accuracy of the machine tool. The movement of the machine tool is realized by the instructions of the numerical control program, so the accuracy depends on the error of the numerical control system and mechanical transmission. The movement of each moving part of the machine tool is completed under the control of the numerical control device. The accuracy that each moving part can achieve under the control of the program instruction directly reflects the accuracy that the machined part can achieve. Therefore, positioning accuracy is a very important test. content.
1. Linear Motion Positioning Accuracy Detection
The positioning accuracy of linear motion is generally carried out under the condition of no-load on the machine tool and workbench. According to national standards and the provisions of the International Organization for Standardization (ISO standards), the inspection of CNC machine tools should be based on laser measurement. In the absence of a laser interferometer, for general users, a standard scale can also be used for comparative measurement with an optical reading microscope. However, the accuracy of the measuring instrument must be 1 to 2 grades higher than the accuracy of the test.
In order to reflect all the errors in multiple positioning, the ISO standard stipulates that each positioning point is based on five measurement data to calculate the average value and the dispersion -3 dispersion band to form the positioning point dispersion band.
2. Linear Motion Repetitive Positioning Accuracy Detection
The instrument used for testing is the same as that used for testing positioning accuracy. The general detection method is to measure at any three positions close to the midpoint and both ends of each coordinate stroke, each position is positioned by rapid movement, and the positioning is repeated 7 times under the same conditions, the value of the stop position is measured and the maximum difference in readings is calculated . Take one-half of the largest difference among the three positions, attach the positive and negative signs, as the repeat positioning accuracy of the coordinate, it is the most basic indicator reflecting the stability of the axis motion accuracy.
3. The Origin Return Accuracy Detection Of Linear Motion
The origin return accuracy is essentially the repeated positioning accuracy of a special point on the coordinate axis, so its detection method is completely the same as the repeated positioning accuracy.
4. Reverse Error Detection Of Linear Motion
The reverse error of linear motion, also known as the loss of motion, includes the reverse dead zone of the driving parts (such as servo motors, servo hydraulic motors and stepping motors, etc.) A comprehensive reflection of errors such as backlash and elastic deformation. The greater the error, the lower the positioning accuracy and repeat positioning accuracy.
The detection method of the reverse error is to move a distance in the forward or reverse direction in advance within the stroke of the measured coordinate axis and use this stop position as a reference, and then give a certain movement command value in the same direction to make it move a certain distance. Then move the same distance in the opposite direction and measure the difference between the stop position and the reference position. Make multiple measurements (generally 7 times) at three positions close to the midpoint and both ends of the stroke, calculate the average value of each position, and take the maximum value of the average value as the reverse error value.
5. Detection Of Positioning Accuracy Of Rotary Table
Measuring tools include standard turntable, angle polyhedron, circular grating and collimator (collimator), etc., which can be selected according to specific conditions. The measurement method is to make the workbench turn forward (or reverse) at an angle and stop, lock, and position, and use this position as a reference, then quickly turn the workbench in the same direction, lock and position every 30, and measure. Forward rotation and reverse rotation each measure one cycle, and the maximum value of the difference between the actual rotation angle of each positioning position and the theoretical value (command value) is the indexing error. If it is a CNC rotary table, every 30 should be used as a target position, and each target position should be quickly positioned 7 times from the positive and negative directions. The difference between the actual position and the target position is the position deviation, and then according to GB10931- The method stipulated in 89 “Evaluation Method of Position Accuracy of Numerically Controlled Machine Tools” calculates the average position deviation and standard deviation, the difference between the maximum sum of all average position deviations and standard deviations and the sum of the minimum values of all average position deviations and standard deviations , is the positioning accuracy error of the CNC rotary table.
Considering the actual use requirements of dry-type transformers, it is generally important to measure several right-angled points such as 0, 90, 180, and 270, and the accuracy of these points is required to be higher than other angular positions.
6. Repeated Indexing Accuracy Detection Of Rotary Table
The measurement method is to choose three positions and repeat the positioning three times within one week of the rotary table, and perform detection under the forward and reverse directions of rotation respectively. The maximum scale accuracy of the difference between all readings and the theoretical value of the corresponding position. If it is a CNC rotary table, take a measurement point every 30 as the target position, and quickly locate each target position 5 times from the positive and negative directions, and measure the difference between the actual position and the target position. That is, the position deviation, and then calculate the standard deviation according to the method specified in GB10931-89, and the 6 times of the maximum value of the standard deviation of each measurement point is the repeat indexing accuracy of the CNC rotary table.
7. Detection Of The Return-To-Origin Accuracy Of The Rotary Table
The measurement method is to perform homing from 7 arbitrary positions, measure the stop position, and take the maximum difference read out as the homing accuracy.
It should be pointed out that the existing detection of positioning accuracy is measured in the case of fast positioning. For some CNC machine tools with poor feed system, different positioning accuracy values will be obtained when different feed speeds are used for positioning. In addition, the measurement results of positioning accuracy are related to the ambient temperature and the working state of the coordinate axis. At present, most CNC machine tools use a semi-closed-loop system, and most of the position detection components are installed on the drive motor, which produces an error of 0.01~0.02mm within a 1m stroke. is not surprising. This is the error caused by thermal elongation, and some machine tools use the method of pre-stretching (pre-tightening) to reduce the effect.
The repeated positioning accuracy of each coordinate axis reflects the most basic accuracy index of the axis, and it reflects the stability of the axis’ motion accuracy. It cannot be imagined that a machine tool with poor accuracy can be stably used in production. At present, due to the increasing number of functions of the numerical control system, system errors such as pitch accumulation errors and backlash errors can be systematically compensated for each coordinate injector standard motion accuracy. Only random errors cannot be compensated, and repeat positioning accuracy It just reflects the comprehensive random error of the feed drive mechanism, which cannot be corrected by the numerical control system compensation. When it is found to be out of tolerance, only the fine adjustment and correction of the feed drive chain can be performed. Therefore, if the machine tool is allowed to be selected, it is better to choose a machine tool with high repeat positioning accuracy.
